b 22 cm x 10 cm urrea herramientas profesionales...
TRANSCRIPT

ATENCIÓN: Lea, entienda y siga las instrucciones de seguridad contenidas en
este instructivo, antes de operar esta herramienta.WARNING: Read, understand and follow the safety rules in this instructive, before operating this tool.
POLIZA DE GARANTÍAWARRANT POLICY
Urrea Herramientas Profesionales S.A. de C.V. km 11,5 Carretera A El Castillo, El Salto, Jalisco, México. C.P. 45680, Tel. (33) 3208 7900, RFC UHP900402Q29, garantiza este producto por el termino de 1 año en sus piezas, componentes y mano de obra contra cualquier defecto de fabricación a partir de la fecha de entrega. Condiciones: Para hacer efectiva la garantía deberá presentar el producto junto con la poliza de garantia debidamente firmada y sellada por el establecimiento donde la adquirio, en cualquiera de los centros de servicio autorizados. Los gastos de transportación que se deriven del cumplimiento de la garantía seran cubiertos por Urrea Herramientas Profesionales S.A. de C.V. Esta garantía no será valida en los siguientes casos:· Cuando el producto haya sido utilizado en condiciones distintas a las normales o al desgaste natural de sus partes. · Cuando el producto no haya sido operado de acuerdo al instructivo de uso que lo acompaña. · Cuando el producto haya sido alterado o reparado por personas no autorizadas.
Sello del distribuidor/Distributor seal:
Fecha /Date:______/ ______/ ______
Urrea Herramientas Profesionales S.A. de C.V. km 11,5 Carretera A El Castillo, El Salto, Jalisco, México. C. P. 45680, Tel. (33) 3208 7900, RFC UHP900402Q29, warranties this product for a period of 1 year in its parts, components and manual labour against any manufacture defect from the purchasing date. Terms: In order to make warranty effective you must present the product along with the warranty properly fillled and signed to an authorized distributor or service center. Urrea Herramientas Profesionales S.A. de C.V. will cover the transportation cost related to the warranty.This warranty is not applicable in the following cases:· When the product has not been used according to normal conditions or natural wear of its parts. · When the product has not been used according with this user’s manual instructions. · When the product has been fixed or modified by unauthorized or unqualified person.
SAFETY INSTRUCTIONS FOR SOLDERING GUNS
E N G L I S H
• Temperature may reach a high of 300˚C when turned on. Do not use near inflammable / flammable materials. Do not touch heated parts, can cause severe burns. Do not touch metallic parts near the Tip.• Soldering process produces smoke, make sure work area is well ventilated.• Take great care to avoid touching the mains flex with the tip of the iron. The iron should have a heatproof flex for extra protection. An ordinary plastic flex will melt immediately if touched by a hot iron and there is a serious risk of burns and electric shock.• Work in a well-ventilated area. The smoke formed as you melt solder is mostly from the flux and is quite irritating. Avoid breathing it by keeping your head on the side and not directly above of your work.• Wash your hands after using solder. Solder may contain lead, which is a poisonous metal.• Cable clip type Z. If the power cord is damaged it can not be replaced in this case, the device must be disposed.
OPERATION INSTRUCTIONSGENERAL FEATURES
This soldering iron includes everything you need to start using solder to repair electric and electronic equipments. Ideal for the professional works and hobbyist enthusiasts.TO TURN ON: Connect soldering iron to electric current.
22 cm x 10 cmVuelta
22 cm x 10 cmFrenteA
B
Cautín Tipo LápizSoldering Iron
OPERATION1. Clean surfaces to be solded, if possible, without damaging roughen with a wire brush or sandpaper. Use alcohol to remove oil or grease. CAUTION: Do not use any other type of solvent, to avoid risk of fire and toxic fumes.2. Heat the part to be welded with the soldering iron.3. Apply resin-based solder to the part previously heated, immediately apply the sold- ering iron to melt the solder.NOTE: When using non-resin-based solder, be sure to apply a solder paste to the pre-heated part before placing the sold- ering iron.4. Wait for the solder to cool and harden before moving the soldered part.
MAINTENANCECARE AND MAINTENANCE OF IRON TIP IMPORTANT: It is recommended not to exceed two minutes of continuous work, to avoid shortening its life.
CLEANING: The iron tip must be cleaned after use, wiping the tip on a cleaning sponge, this is to get rid of the residue of solder that can cause oxidation of the tip. If the tip has a bit of rust, apply solder and wipe with sponge, repeat these steps until you remove the oxidation.Additionally, you will need to clean the tips periodically when used for an extended period of time (remove the tip from the soldering iron and clean once a week).
Conical tip.
The soldering tips are chrome galvanized on the surface and should be bright silver without waste or welding on it.If there is a venting or deformation on the tip, replace it. Remember to prepare the tip with tin for the next use.
WHEN NOT IN USEIf a soldering iron has not a consistent and thin layer of solder or tin, then the tip has not been properly prepared. When not using the soldering iron, make sure to leave a large chunk of solder on the tip.This will keep the tin in the tip and the tip will last much longer. Many technicians mistakenly clean the tip before stopping using the soldering iron. Leave the solder on the tip to protect it.
TECHNICAL DATAVOLTAGE-FREQUENCY: 127 V ~ 60 Hz TEMPERATURE: 430˚CPOWER: 30 WPOWER CONSUMPTION: 0,03 kWh
144470
11/01/2016 Producto nuevo
Cautín Tipo LápizSoldering Iron
Descripción /Description
CONTROL DE CAMBIOS E INFORMACIÓN DE ARTE / INFORMATION & UPDATE LOGFecha /Date Información /Information
Proveedor /Supplier
Material /Material Colores /Spot colors
Diseñador /DesignerVersión /Version Versión de software /Software version
NINGBO HANHUA INTERNATIONAL TRADING CO., LTD
Araceli ArceoAdobe Illustrator
04-A16
Código /Code
144470
C M Y K
GUÍA DE IMPRESION PARA INSTRUCTIVO / INSTRUCTIVE PRINTING GUIDE
LÍNEA DE CORTE “NO IMPRIMIR”CUT-LINE “DO NOT PRINT”
LÍNEA DE DOBLEZ “NO IMPRIMIR”FOLD LINE “DO NOT PRINT”
• Do not change printing fonts and sizes.
• All inks are spot colors, print them as direct inks.• Any changes needed, should be asked previously.• This program is needed in
accordance to open/print this artwork.
Papel blanco con protección uv, terminado mate. El papel puede ser bond o couché.White paper with uv mate coating, paper can be bond or coated paper.
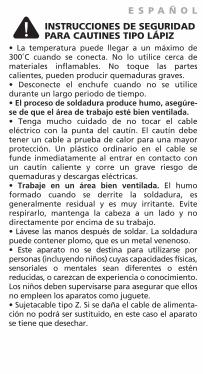
INSTRUCCIONES DE SEGURIDAD PARA CAUTINES TIPO LÁPIZ
E S P A Ñ O L
• La temperatura puede llegar a un máximo de 300˚C cuando se conecta. No lo utilice cerca de materiales inflamables. No toque las partes calientes, pueden producir quemaduras graves.• Desconecte el enchufe cuando no se utilice durante un largo periodo de tiempo. • El proceso de soldadura produce humo, asegúre-se de que el área de trabajo esté bien ventilada.• Tenga mucho cuidado de no tocar el cable eléctrico con la punta del cautín. El cautín debe tener un cable a prueba de calor para una mayor protección. Un plástico ordinario en el cable se funde inmediatamente al entrar en contacto con un cautín caliente y corre un grave riesgo de quemaduras y descargas eléctricas.• Trabaje en un área bien ventilada. El humo formado cuando se derrite la soldadura, es generalmente residual y es muy irritante. Evite respirarlo, mantenga la cabeza a un lado y no directamente por encima de su trabajo.• Lávese las manos después de soldar. La soldadura puede contener plomo, que es un metal venenoso.• Este aparato no se destina para utilizarse por personas (incluyendo niños) cuyas capacidades físicas, sensoriales o mentales sean diferentes o estén reducidas, o carezcan de experiencia o conocimiento. Los niños deben supervisarse para asegurar que ellos no empleen los aparatos como juguete.• Sujetacable tipo Z. Si se daña el cable de alimenta-ción no podrá ser sustituido, en este caso el aparato se tiene que desechar.
INSTRUCCIONES DE OPERACIÓNCARACTERÍSTICAS GENERALES
Este cautín incluye todo lo que necesita para trabajos de reparación en equipos eléctricos y/o electrónicos. Ideal para trabajos profesionales y aficionados.
PARA ENCENDER: Conecte el cautín a la corriente eléctrica.
OPERACIÓN1. Limpie las superficies a soldar, de ser posible, ráspelas sin dañarlas con un cepillo de alambre o lija. Use alcohol para remover aceite o grasa. PRECAUCIÓN: No utilice otro tipo de solvente, para evitar riesgo de fuego y vapores tóxicos.2. Caliente la parte a soldar con el cautín.3. Coloque soldadura a base de resina a la parte que calentó previamente, enseguida apli- que el cautín para derretir la soldadura. NOTA: Cuando use una soldadura que no contenga base de resina, asegúrese de aplicar una pasta de soldadura a la parte pre-calentada antes de colocar el cautín.4. Espere a que la soldadura se enfríe y endurezca antes de quitar la parte soldada.
MANTENIMIENTO: CUIDADO Y MANTENIMIEN-TO DE LA PUNTA DEL CAUTÍN IMPORTANTE: Se recomienda no exceder los dos minutos de trabajo contínuo para evitar que se reduzca su vida útil.
Punta cónica.
LIMPIEZA: La punta del cautín debe limpiarse después de usarlo frotandola sobre una esponja limpiadora, esto es para deshacerse del residuo de soldadura que puede causar la oxidación de la punta. Si la punta tiene un poco de óxido, aplique soldadura y limpie con la esponja, repita estos pasos hasta que se elimine la oxidación. Adicionalmente se necesitará una limpieza regular cuando se utilizan puntas durante un periodo prolongado de tiempo (retire la punta del soldador y limpie una vez por semana). Las puntas de soldadura son de cromo galvanizado en la superficie y deben ser de color plata brillante sin residuos o soldadura sobre él. Si se observa una deformación en la punta, cámbiela. Recuerde preparar la punta con estaño para el siguiente uso.
CUANDO NO LO UTILICE: Cuando no utilice el cautín, asegúrese de dejar un gran trozo de soldadura en la punta. El hacer esto, mantendrá el estaño en la punta y a su vez la punta va a durar mucho más tiempo. Deje la soldadura en la punta para protegerlo.
ESPECIFICACIONES TÉCNICASVOLTAJE-FRECUENCIA: 127 V ~ 60 Hz TEMPERATURA: 430˚CPOTENCIA: 30 WCONSUMO ENERGÉTICO: 0,03 kWh
ATENCIÓN: Lea, entienda y siga las instrucciones de seguridad contenidas en
este instructivo, antes de operar esta herramienta.WARNING: Read, understand and follow the safety rules in this instructive, before operating this tool.
POLIZA DE GARANTÍAWARRANT POLICY
Urrea Herramientas Profesionales S.A. de C.V. km 11,5 Carretera A El Castillo, El Salto, Jalisco, México. C.P. 45680, Tel. (33) 3208 7900, RFC UHP900402Q29, garantiza este producto por el termino de 1 año en sus piezas, componentes y mano de obra contra cualquier defecto de fabricación a partir de la fecha de entrega. Condiciones: Para hacer efectiva la garantía deberá presentar el producto junto con la poliza de garantia debidamente firmada y sellada por el establecimiento donde la adquirio, en cualquiera de los centros de servicio autorizados. Los gastos de transportación que se deriven del cumplimiento de la garantía seran cubiertos por Urrea Herramientas Profesionales S.A. de C.V. Esta garantía no será valida en los siguientes casos:· Cuando el producto haya sido utilizado en condiciones distintas a las normales o al desgaste natural de sus partes. · Cuando el producto no haya sido operado de acuerdo al instructivo de uso que lo acompaña. · Cuando el producto haya sido alterado o reparado por personas no autorizadas.
Sello del distribuidor/Distributor seal:
Fecha /Date:______/ ______/ ______
Urrea Herramientas Profesionales S.A. de C.V. km 11,5 Carretera A El Castillo, El Salto, Jalisco, México. C. P. 45680, Tel. (33) 3208 7900, RFC UHP900402Q29, warranties this product for a period of 1 year in its parts, components and manual labour against any manufacture defect from the purchasing date. Terms: In order to make warranty effective you must present the product along with the warranty properly fillled and signed to an authorized distributor or service center. Urrea Herramientas Profesionales S.A. de C.V. will cover the transportation cost related to the warranty.This warranty is not applicable in the following cases:· When the product has not been used according to normal conditions or natural wear of its parts. · When the product has not been used according with this user’s manual instructions. · When the product has been fixed or modified by unauthorized or unqualified person.
SAFETY INSTRUCTIONS FOR SOLDERING GUNS
E N G L I S H
• Temperature may reach a high of 300˚C when turned on. Do not use near inflammable / flammable materials. Do not touch heated parts, can cause severe burns. Do not touch metallic parts near the Tip.• Soldering process produces smoke, make sure work area is well ventilated.• Take great care to avoid touching the mains flex with the tip of the iron. The iron should have a heatproof flex for extra protection. An ordinary plastic flex will melt immediately if touched by a hot iron and there is a serious risk of burns and electric shock.• Work in a well-ventilated area. The smoke formed as you melt solder is mostly from the flux and is quite irritating. Avoid breathing it by keeping your head on the side and not directly above of your work.• Wash your hands after using solder. Solder may contain lead, which is a poisonous metal.• Cable clip type Z. If the power cord is damaged it can not be replaced in this case, the device must be disposed.
OPERATION INSTRUCTIONSGENERAL FEATURES
This soldering iron includes everything you need to start using solder to repair electric and electronic equipments. Ideal for the professional works and hobbyist enthusiasts.TO TURN ON: Connect soldering iron to electric current.
22 cm x 10 cmVuelta
22 cm x 10 cmFrenteA
B
Cautín Tipo LápizSoldering Iron
OPERATION1. Clean surfaces to be solded, if possible, without damaging roughen with a wire brush or sandpaper. Use alcohol to remove oil or grease. CAUTION: Do not use any other type of solvent, to avoid risk of fire and toxic fumes.2. Heat the part to be welded with the soldering iron.3. Apply resin-based solder to the part previously heated, immediately apply the sold- ering iron to melt the solder.NOTE: When using non-resin-based solder, be sure to apply a solder paste to the pre-heated part before placing the sold- ering iron.4. Wait for the solder to cool and harden before moving the soldered part.
MAINTENANCECARE AND MAINTENANCE OF IRON TIP IMPORTANT: It is recommended not to exceed two minutes of continuous work, to avoid shortening its life.
CLEANING: The iron tip must be cleaned after use, wiping the tip on a cleaning sponge, this is to get rid of the residue of solder that can cause oxidation of the tip. If the tip has a bit of rust, apply solder and wipe with sponge, repeat these steps until you remove the oxidation.Additionally, you will need to clean the tips periodically when used for an extended period of time (remove the tip from the soldering iron and clean once a week).
Conical tip.
The soldering tips are chrome galvanized on the surface and should be bright silver without waste or welding on it.If there is a venting or deformation on the tip, replace it. Remember to prepare the tip with tin for the next use.
WHEN NOT IN USEIf a soldering iron has not a consistent and thin layer of solder or tin, then the tip has not been properly prepared. When not using the soldering iron, make sure to leave a large chunk of solder on the tip.This will keep the tin in the tip and the tip will last much longer. Many technicians mistakenly clean the tip before stopping using the soldering iron. Leave the solder on the tip to protect it.
TECHNICAL DATAVOLTAGE-FREQUENCY: 127 V ~ 60 Hz TEMPERATURE: 430˚CPOWER: 30 WPOWER CONSUMPTION: 0,03 kWh
144470
11/01/2016 Producto nuevo
Cautín Tipo LápizSoldering Iron
Descripción /Description
CONTROL DE CAMBIOS E INFORMACIÓN DE ARTE / INFORMATION & UPDATE LOGFecha /Date Información /Information
Proveedor /Supplier
Material /Material Colores /Spot colors
Diseñador /DesignerVersión /Version Versión de software /Software version
NINGBO HANHUA INTERNATIONAL TRADING CO., LTD
Araceli ArceoAdobe Illustrator
04-A16
Código /Code
144470
C M Y K
GUÍA DE IMPRESION PARA INSTRUCTIVO / INSTRUCTIVE PRINTING GUIDE
LÍNEA DE CORTE “NO IMPRIMIR”CUT-LINE “DO NOT PRINT”
LÍNEA DE DOBLEZ “NO IMPRIMIR”FOLD LINE “DO NOT PRINT”
• Do not change printing fonts and sizes.
• All inks are spot colors, print them as direct inks.• Any changes needed, should be asked previously.• This program is needed in
accordance to open/print this artwork.
Papel blanco con protección uv, terminado mate. El papel puede ser bond o couché.White paper with uv mate coating, paper can be bond or coated paper.
INSTRUCCIONES DE SEGURIDAD PARA CAUTINES TIPO LÁPIZ
E S P A Ñ O L
• La temperatura puede llegar a un máximo de 300˚C cuando se conecta. No lo utilice cerca de materiales inflamables. No toque las partes calientes, pueden producir quemaduras graves.• Desconecte el enchufe cuando no se utilice durante un largo periodo de tiempo. • El proceso de soldadura produce humo, asegúre-se de que el área de trabajo esté bien ventilada.• Tenga mucho cuidado de no tocar el cable eléctrico con la punta del cautín. El cautín debe tener un cable a prueba de calor para una mayor protección. Un plástico ordinario en el cable se funde inmediatamente al entrar en contacto con un cautín caliente y corre un grave riesgo de quemaduras y descargas eléctricas.• Trabaje en un área bien ventilada. El humo formado cuando se derrite la soldadura, es generalmente residual y es muy irritante. Evite respirarlo, mantenga la cabeza a un lado y no directamente por encima de su trabajo.• Lávese las manos después de soldar. La soldadura puede contener plomo, que es un metal venenoso.• Este aparato no se destina para utilizarse por personas (incluyendo niños) cuyas capacidades físicas, sensoriales o mentales sean diferentes o estén reducidas, o carezcan de experiencia o conocimiento. Los niños deben supervisarse para asegurar que ellos no empleen los aparatos como juguete.• Sujetacable tipo Z. Si se daña el cable de alimenta-ción no podrá ser sustituido, en este caso el aparato se tiene que desechar.
INSTRUCCIONES DE OPERACIÓNCARACTERÍSTICAS GENERALES
Este cautín incluye todo lo que necesita para trabajos de reparación en equipos eléctricos y/o electrónicos. Ideal para trabajos profesionales y aficionados.
PARA ENCENDER: Conecte el cautín a la corriente eléctrica.
OPERACIÓN1. Limpie las superficies a soldar, de ser posible, ráspelas sin dañarlas con un cepillo de alambre o lija. Use alcohol para remover aceite o grasa. PRECAUCIÓN: No utilice otro tipo de solvente, para evitar riesgo de fuego y vapores tóxicos.2. Caliente la parte a soldar con el cautín.3. Coloque soldadura a base de resina a la parte que calentó previamente, enseguida apli- que el cautín para derretir la soldadura. NOTA: Cuando use una soldadura que no contenga base de resina, asegúrese de aplicar una pasta de soldadura a la parte pre-calentada antes de colocar el cautín.4. Espere a que la soldadura se enfríe y endurezca antes de quitar la parte soldada.
MANTENIMIENTO: CUIDADO Y MANTENIMIEN-TO DE LA PUNTA DEL CAUTÍN IMPORTANTE: Se recomienda no exceder los dos minutos de trabajo contínuo para evitar que se reduzca su vida útil.
Punta cónica.
LIMPIEZA: La punta del cautín debe limpiarse después de usarlo frotandola sobre una esponja limpiadora, esto es para deshacerse del residuo de soldadura que puede causar la oxidación de la punta. Si la punta tiene un poco de óxido, aplique soldadura y limpie con la esponja, repita estos pasos hasta que se elimine la oxidación. Adicionalmente se necesitará una limpieza regular cuando se utilizan puntas durante un periodo prolongado de tiempo (retire la punta del soldador y limpie una vez por semana). Las puntas de soldadura son de cromo galvanizado en la superficie y deben ser de color plata brillante sin residuos o soldadura sobre él. Si se observa una deformación en la punta, cámbiela. Recuerde preparar la punta con estaño para el siguiente uso.
CUANDO NO LO UTILICE: Cuando no utilice el cautín, asegúrese de dejar un gran trozo de soldadura en la punta. El hacer esto, mantendrá el estaño en la punta y a su vez la punta va a durar mucho más tiempo. Deje la soldadura en la punta para protegerlo.
ESPECIFICACIONES TÉCNICASVOLTAJE-FRECUENCIA: 127 V ~ 60 Hz TEMPERATURA: 430˚CPOTENCIA: 30 WCONSUMO ENERGÉTICO: 0,03 kWh